Struggling to get the most out of Midjourney’s image generation?
Using reference photos is the secret sauce to achieving detailed, accurate results.
This guide will cover how to easily upload and leverage refs in prompts to unlock Midjourney’s full potential for stunning AI art.
What Are Reference Photos and Why Use Them?
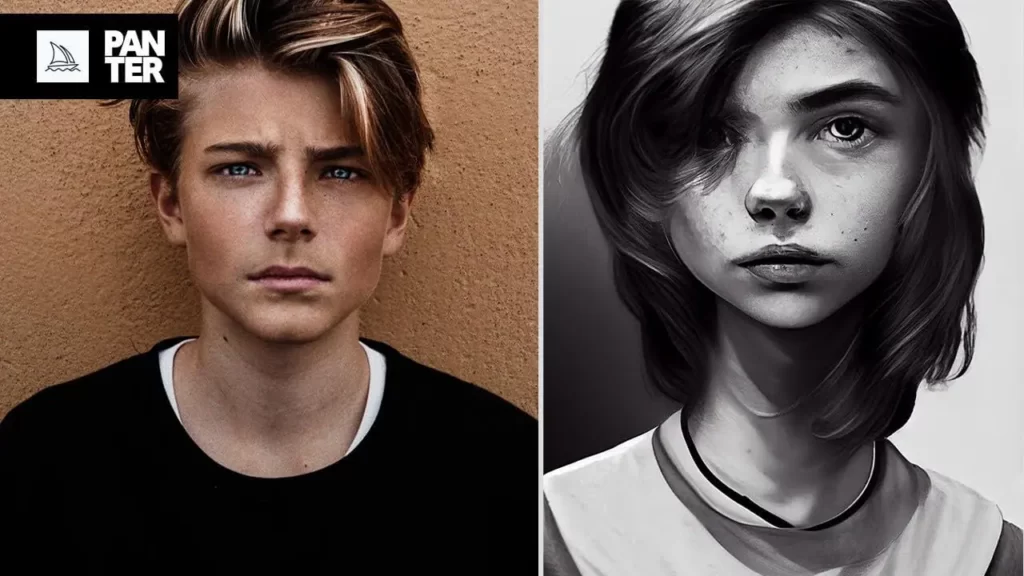
Reference photos, also known as refs, are additional images that you provide to AI art generators like Midjourney to help inform and guide the image generation process.
Using reference photos can help you achieve more accurate, detailed, and higher-quality AI-generated images.
There are several key reasons why using reference photos with Midjourney can be beneficial:
- Achieve accuracy – Reference photos allow you to show Midjourney exactly what you want to be included in the final image. This helps the AI understand small details and generate a more accurate representation.
- Add context – Reference photos provide additional context about the subject matter, setting, style, etc. that text prompts alone may not fully convey.
- Direct the composition – You can arrange multiple reference photos to indicate the desired composition, framing, pose, etc. for your AI art.
- Guide finer details – Details like textures, colors, lighting, and shapes can be pulled from reference images leading to more photorealistic and high-fidelity results.
- Spark new ideas – Browsing reference photos can give you fresh inspiration for prompt ideas you may not have considered before.
- Save prompt length – You can cut down on verbose text prompts by using a reference photo to convey descriptions.
Choosing & Optimizing Reference Photos
Not all reference photos are created equal. To get the most out of refs, keep these tips in mind when selecting and preparing them:
- Choose high-quality images – Images should be high-resolution and contain ample visual detail. Avoid low-res images.
- Pick fitting concepts – Ensure the reference photo subject matter matches your desired prompt concept. Don’t use landscape photos for a portrait prompt.
- Limit quantity – Stick to 1-3 reference photos in most cases. Too many can overwhelm and confuse Midjourney’s image generation.
- Crop creatively – Crop images to highlight the key details you want Midjourney to focus on and potentially incorporate into the final output.
- Adjust size and orientation – Resize and orient images to convey your desired framing and composition for the AI art.
- Remove text – Eliminate any text from reference photos to avoid unintended outputs.
- Simplify backgrounds – Simple, plain backgrounds help the AI concentrate on the key foreground elements.
- Enhance lighting – Use editing software to boost contrast, shadows highlight, etc. to make details clearer.
How to Upload Reference Images in Midjourney?
Uploading reference photos into Midjourney is simple.
Just follow these steps:
- Join the Midjourney Discord server if you haven’t already.
- Navigate to the #newbies channel.
- Drag and drop your reference image files into the Discord chat box.
- Midjourney will automatically upload the images and assign them each an ID number.
- Note the ID numbers as you will need to refer to them later in your prompt.
And that’s it, your reference photos are now uploaded into Midjourney and ready to use! The key is ensuring you take note of the system-assigned ID for each image.
How to Use Reference Photos in Midjourney? (Step-by-step Guide)
Using your uploaded reference images in Midjourney is easy once you know the syntax. Here is a step-by-step walkthrough:
- Enter your text prompt describing the desired AI art as normal.
- Add a comma after the text prompt followed by “/imagereference” without any spaces.
- Next, insert the reference image ID number that Midjourney assigned when you uploaded the image.
- To use multiple reference images, simply add additional “/image reference” and ID numbers separated by commas.
- Finish by entering “/ar 2:3” to generate the art at a 2:3 aspect ratio.
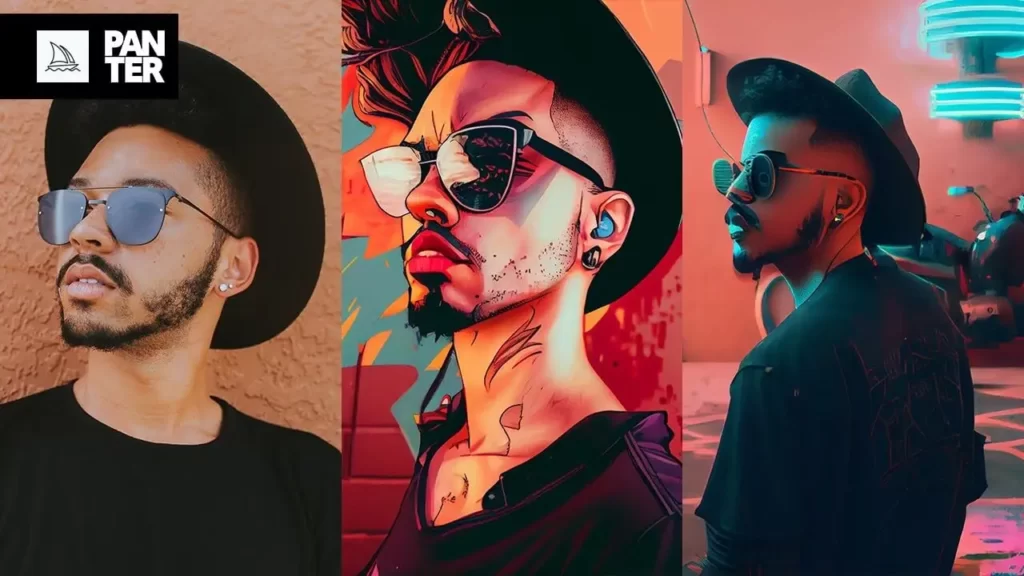
An astronaut riding a horse on Mars, /imagereference152342345123, /imagereference452345534, /ar 2:3Different Ways of Using Reference Photos in Midjourney
There are a few different approaches you can take when using reference photos in Midjourney prompts:
- Inspiration – Upload references just to spark ideas and creativity without directly inserting image IDs into your prompt.
- Subject focus – Use a single reference photo to clearly define the primary subject you want as the focus.
- Backgrounds/environments – Provide additional references showing the setting, environment, or background.
- Composition – Arrange multiple references to convey the exact composition and framing you desire.
- Style matching – References with a certain art style can guide Midjourney to mimic that aesthetic.
- Details – Use cropped refs to make Midjourney include intricate details like textures and patterns.
- Mashups – Combine disparate refs like animals, objects, etc. to have Midjourney blend them into a hybrid creation.
Experiment with different approaches to discover what yields your preferred results.
Advanced Tips for Using Reference Photos
Here are some pro-level tips for taking your reference photo usage to the next level:
- Vary the order – Place prominent refs first, secondary supportive refs later.
- Adjust weighting – Use “/imagereference50%” to make a ref less dominant.
- Try mixes – Combine some refs into your prompt, while leaving others as inspiration.
- Add descriptions – Supplement refs with descriptive text to hone details.
- Chain prompts – Build gradually by generating using refs, then feed that output back into the next prompt.
- Remove refs – Once satisfied, render final images without refs for a more cohesive result.
- Create composites – Edit together the best parts from multiple generations to make your own composed final image.
How to Apply Reference Image Weight in Midjourney?
By default, Midjourney gives equal weighting to all reference images you provide in a prompt. But you can adjust the prominence of certain refs using percentages:
- /imagereference50%: – Makes the image only half as influential.
- /imagereference150%: – Makes the image more dominant by 50%.
- /imagereference200%: – Doubles the image’s weighting and prominence.
For example:
An astronaut riding a horse on Mars, /imagereference452345534, /imagereference50%7897564534, /ar 2:3Here the second reference image ID will only be half as influential as the first.
Playing with these percentages gives you granular control over how much impact each reference photo has.
How to Use the Same Image in Midjourney?
If you want Midjourney to simply recreate a reference image more closely, you can use:
/imagereference100%:[image ID]This maximizes the weighting to 100% for that image ID, making it the sole focus.
For example:
/imagereference100%:2345567, a beautiful paintingWould attempt to closely reproduce image ID 2345567 as a beautiful painting.
How to Combine Two Photos in Midjourney?
To blend two reference images, list both their IDs separated by a comma:
/imagereference2345567, /imagereference97765432, a hybrid digital art mashup merging both images creatively.Midjourney will intelligently composite together elements from both source images into the final AI art.
Midjourney Reference Image Not Working
If your reference images don’t seem to be influencing the output, here are some troubleshooting tips:
- Double check the image IDs are correct
- Try giving the refs more weighting
- Use just 1 reference image
- Verify refs are uploaded and visible in Discord
- Use square refs instead of portraits/landscapes
- Check that prompt concepts align with the refs
- Try generating again using the same prompt
How to Use the Describe Functionality in Midjourney?
Midjourney’s /description feature lets you provide additional descriptive details about specific reference images.
For example:
/imagereference12345: a close-up view of a fluffy brown dog outdoors
/describe: fluffy fur, cute brown puppy with green collar
This appends extra descriptive context to the associated reference when generating the image.
How to Swap Your Face in Midjourney?
To swap your face into an existing image, follow this template:
An exact digital replica of [reference image ID], but replace the face with my face from [your selfie image ID]For example:
An exact digital replica of 234555, but replace the face with my face from 9876543This will intelligently blend your facial features into the source image while preserving other details.
Final Thoughts
Reference photos unlock a whole new level of control, precision, and quality when creating AI art with Midjourney.
Taking the time to find fitting refs, optimize them, and craft prompts that leverage them effectively can vastly improve your results and capabilities.
With so many ways to utilize references, a bit of experimentation will help you determine which approaches work best for your needs.
I have been working with AI prompts for over 5 years, and I have published several articles and books on the topic. I am passionate about the potential of AI prompts to help people create better content. I am also a frequent speaker at AI conferences, where I share my knowledge and expertise with others.